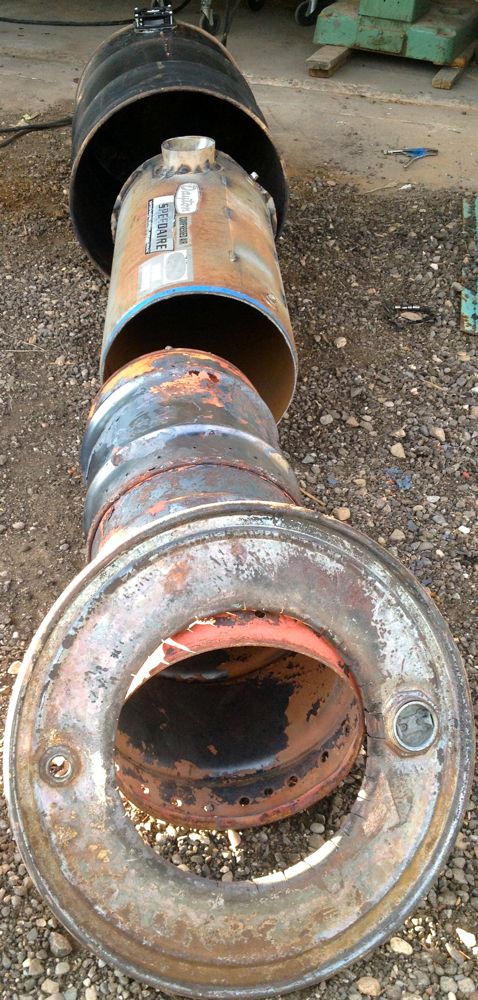
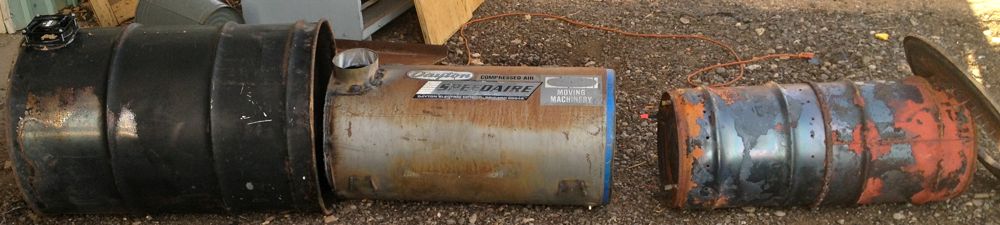
I added an intermediate chamber between the burn chamber and the outer 55 gallon drum. I made it by cutting the dome ends off an air compressor tank then welding flat plate back on one end. The diameter of it is 16 inches so there is an air gap of around an inch between it and the burn chamber. I had to shorten the legs at the bottom of the burn chamber to get the height of both these chambers to match when installed. Note show are 3 inch spacers welded to the air tank section to keep in centered in the 55 gallon drum. I came up with a set of about 4" ID tubes that fit into each other for the air from the fan. The larger piece was welded into a hole cut in the air tank section and the smaller was welded to a plate that the fan attached to. Once the inner chamber is in place and lined up with the outer hole, you just push the tube with the fan on it into the hole and into the inner tube. The reason for this is that I intend to put high temperature insulation (vermiculite) between the outer and intermediate walls so heat is not wasted out the walls of the burner. The outer wall got really hot initially and was still too hot with just the intermediate wall in place.
An initial test run was done with this configuration last night. It yielded about 150 gallons of hot soak tub water with a rather modest bit of firewood in the burn chamber. This time it was plumbed "properly" so that city water pressure was feeding it in the right place and hot water was taken out the top where it should be rather than out the bottom drain. Top tank temperature was still showing 110 when we were done. I plugged a number of the burn air holes in the bottom of the burn chamber this time. We still got got good burn and gasification burn action but the fire was not nearly as vigorous as before. I don't know how much of this was due to lesser fuel load versus lower initial burn air. It was dark so I don't know for sure if the over-fuel smoke went away but I think it was a cleaner burner once it got going.
I will make test runs with know amounts of fuel once the efficiency upgrades are in place.
The images below show how the parts go together. There is actually another ring with a hole in it that goes on top of the drum lid and under the water heater section (not shown). Insulation will be added on either side of this top ring for a better seal between the burner and the water heater. Note that I am doing this as a very low budget project, using materials I have on hand. The exception will be the high temperature insulation I will have to buy in the next day or two.

Leave a comment